Life and Travel with Jessica
  • Home
  • Blog
  • Shop
  • About
  • Work With Me
  • Travel
  • Bucket List
  • Contact

A Very Vintage Valentine's Day Makeup Tutorial

2/7/2016

2 Comments

 
A Very Vintage Valentine's Day Makeup Tutorial
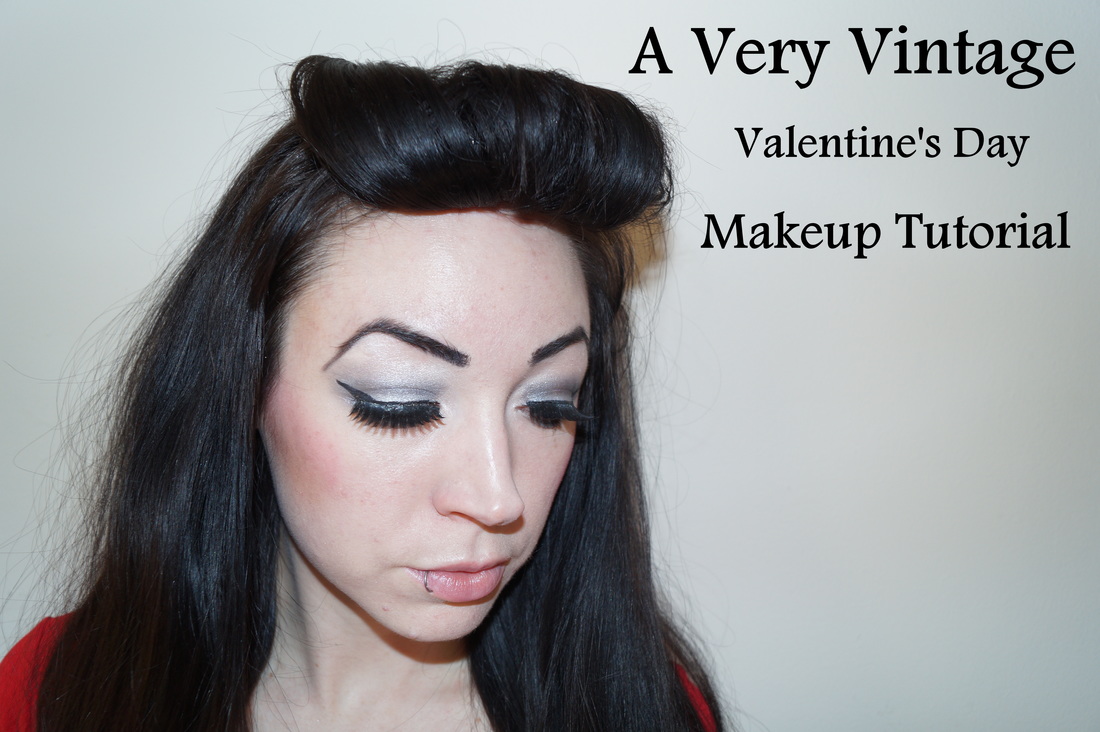
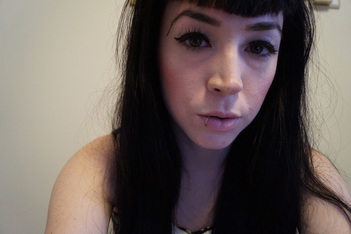
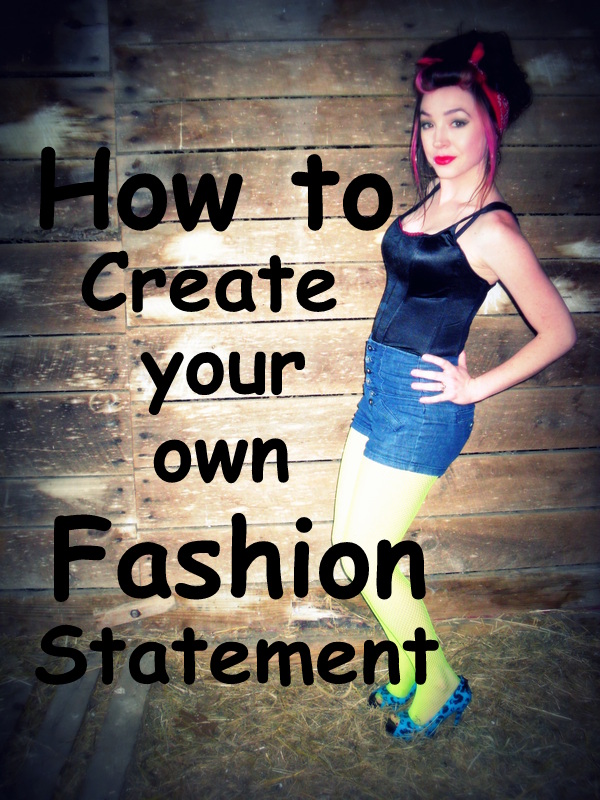
For my Valentine's Day makeup, I wanted to do something different than the traditional pink and red romantic look. I wanted a sexy look. A vintage sort of pinup look that would be a great look for that hot and steamy Valentine's date! So here I have for you my Very Vintage Valentine's Day Makeup Tutorial!

A Very Vintage Valentine's Day Makeup Tutorial
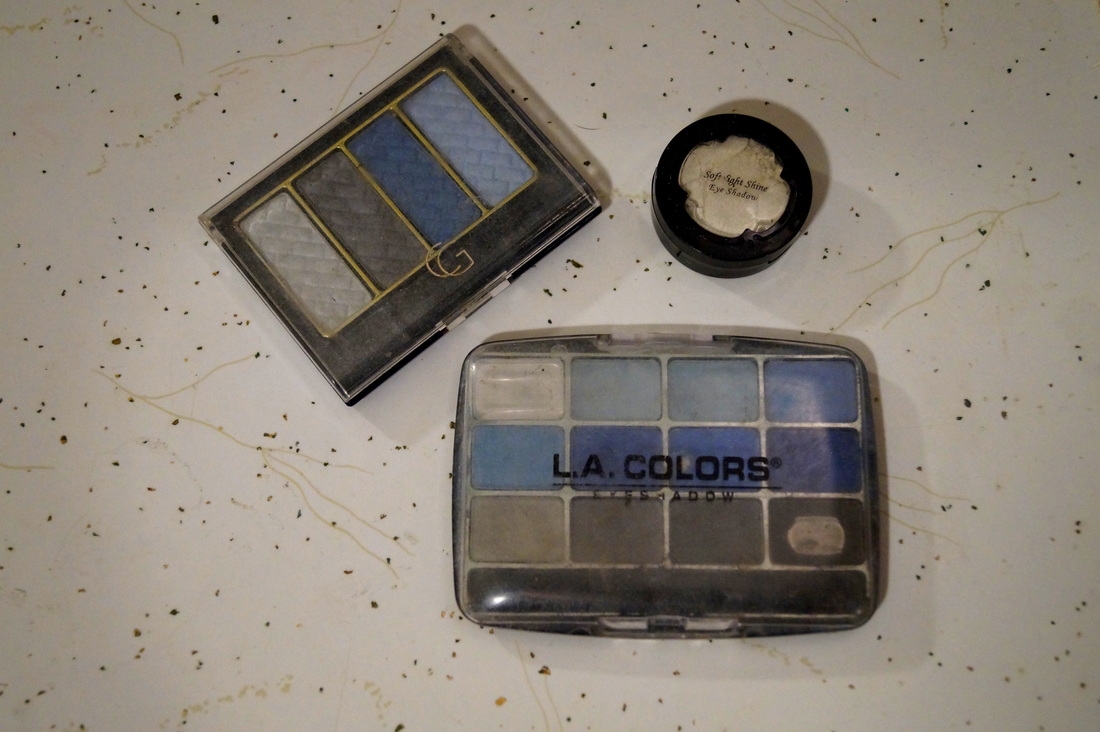
All the makeup I used, can be found in a drugstore. No expensive brands here! Any palette with white, greys, and blacks will work! You will also need 3 shadow brushes, liquid eyeliner, and a set of fake eyelashes. You can find falsies at any drugstore or beauty supply. Go for big fun ones!
​

A Very Vintage Valentine's Day Makeup Tutorial
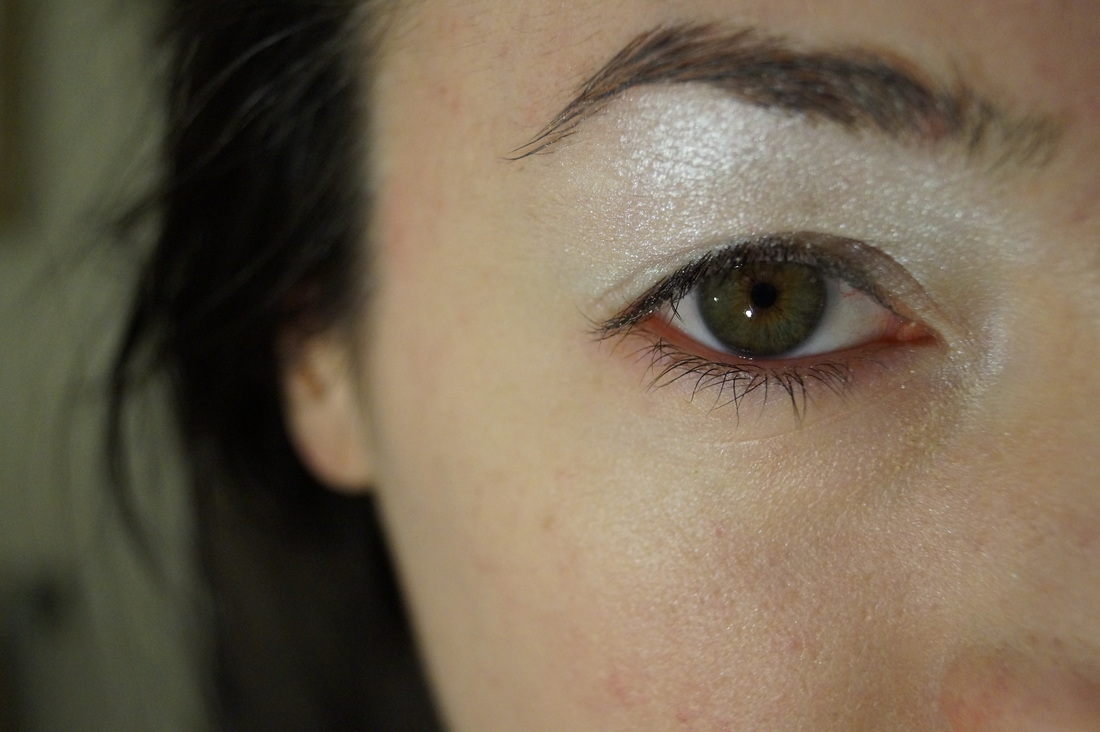
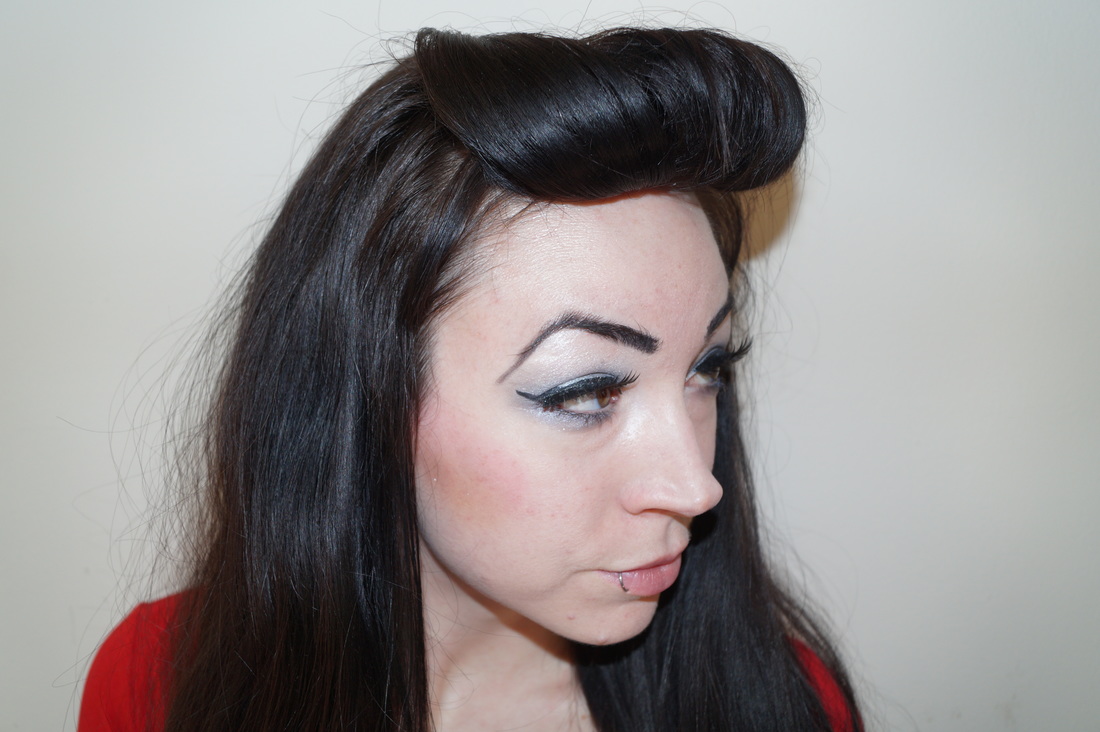
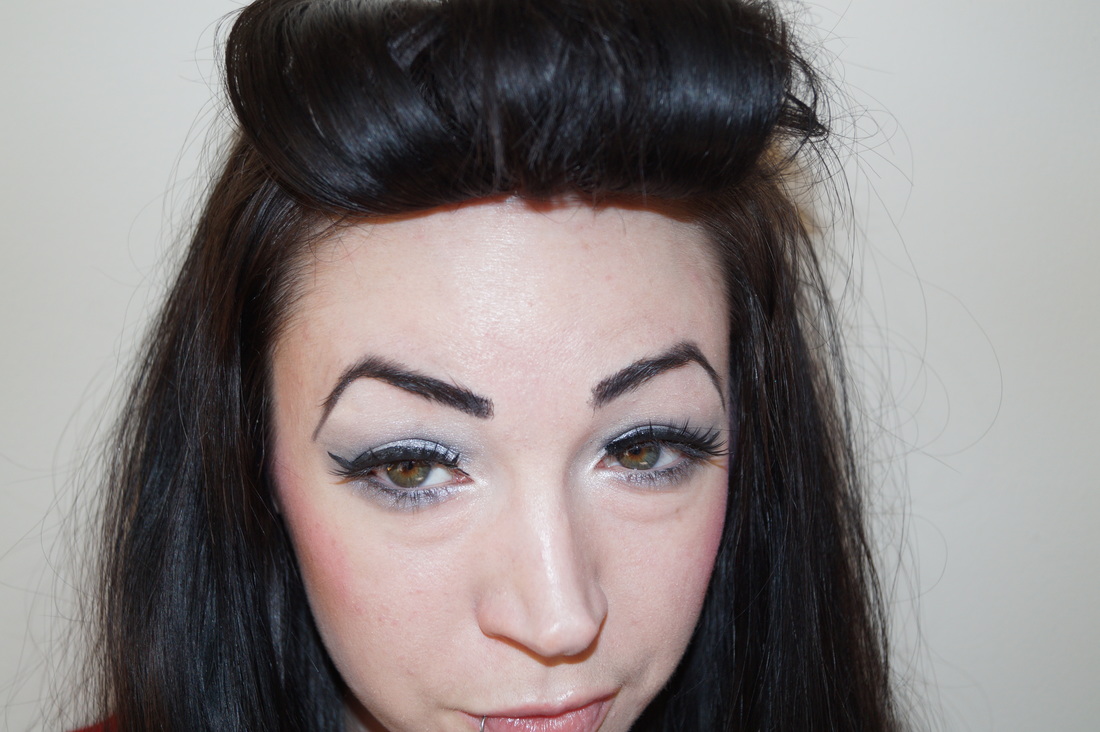
Step 1. From lash line to brow bone, sweep your white/pearlescent shadow. Make sure to get the inside of your eye, it brightens up your whole face!
A Very Vintage Valentine's Day Makeup Tutorial
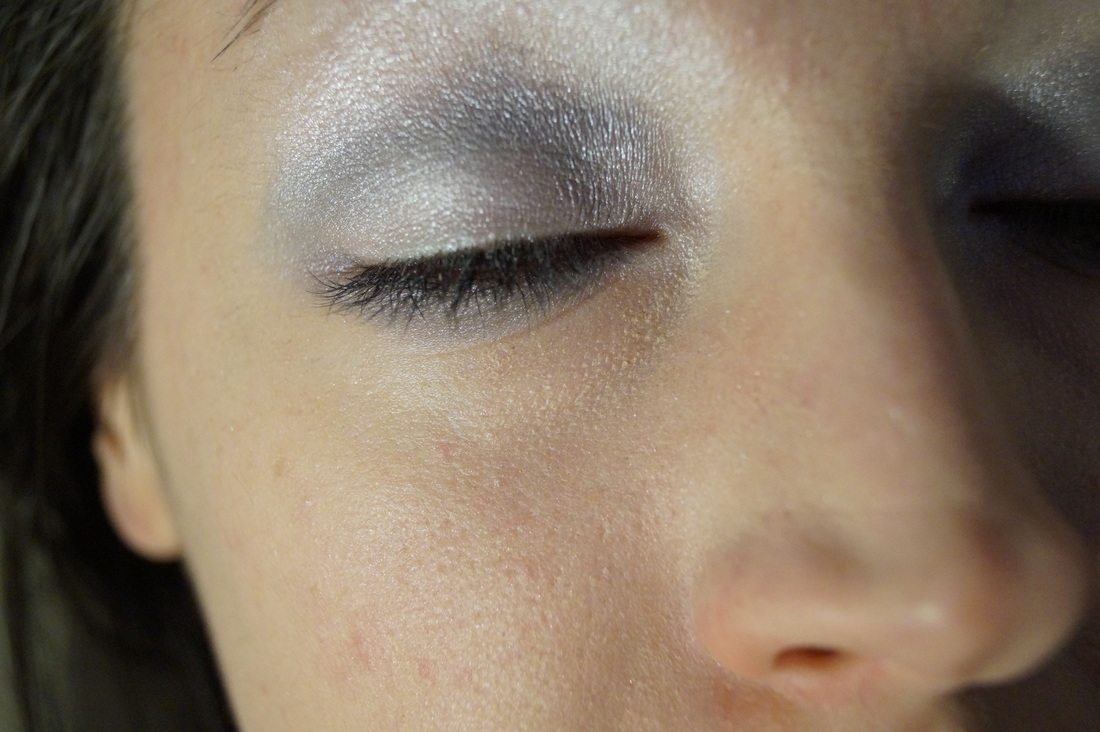
Step 2. Brush your dark grey shadow into your crease, and then underneath your eye, along the lash line, making a sort of semi-circle around your eye.
A Very Vintage Valentine's Day Makeup Tutorial
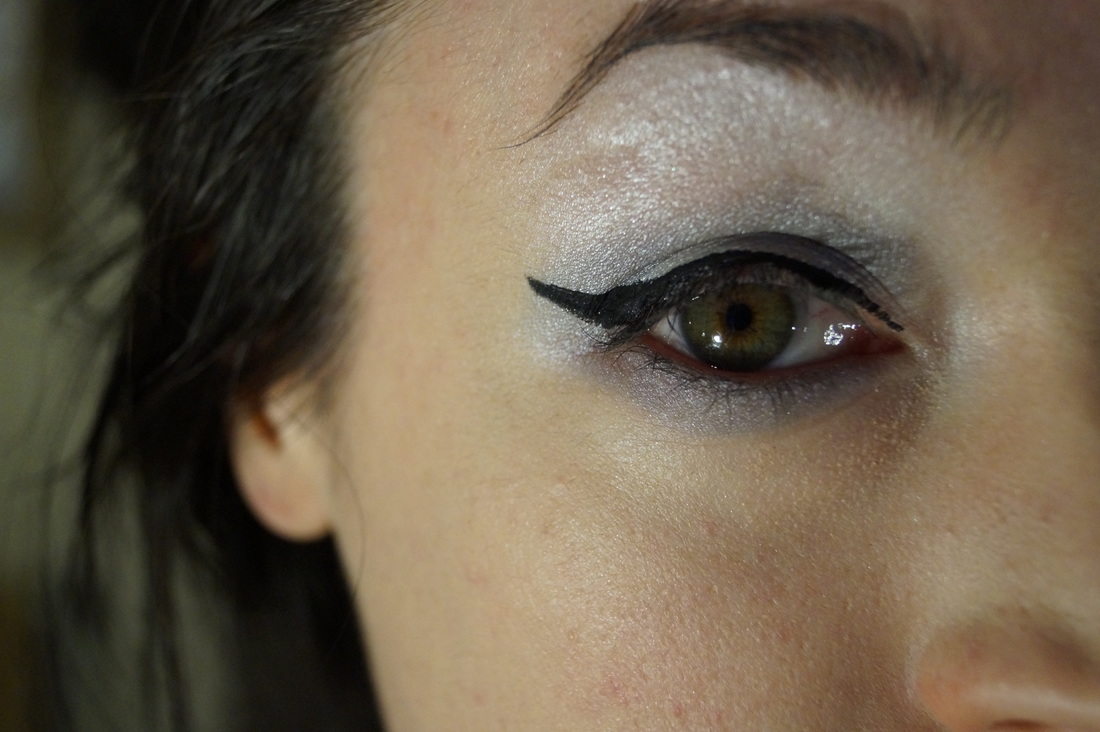
Step 3. Brush liquid eyeliner along your top lash line, in a thick line. Extend it out, into a wing shape.
A Very Vintage Valentine's Day Makeup Tutorial
Step 4. Brush your dark grey shadow along the winged part of the eyeliner. Top and bottom.
A Very Vintage Valentine's Day Makeup Tutorial
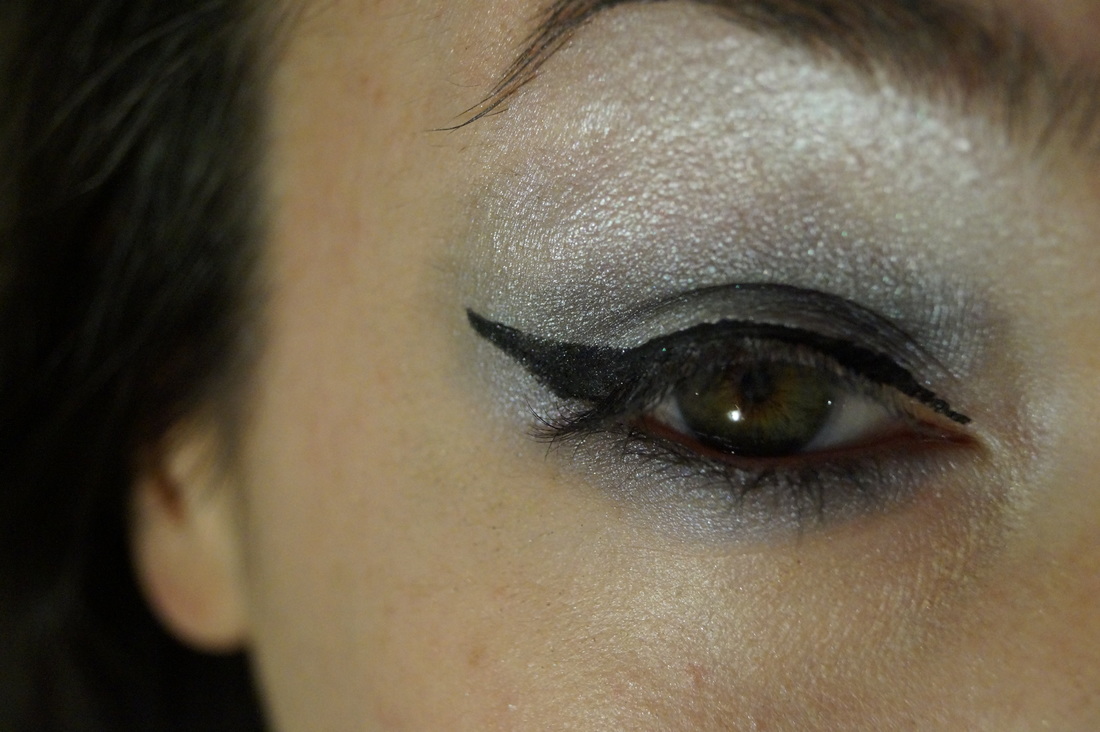
Step 5. Brush a black eyeshadow into your crease, until you get a great smoky look.
A Very Vintage Valentine's Day Makeup Tutorial
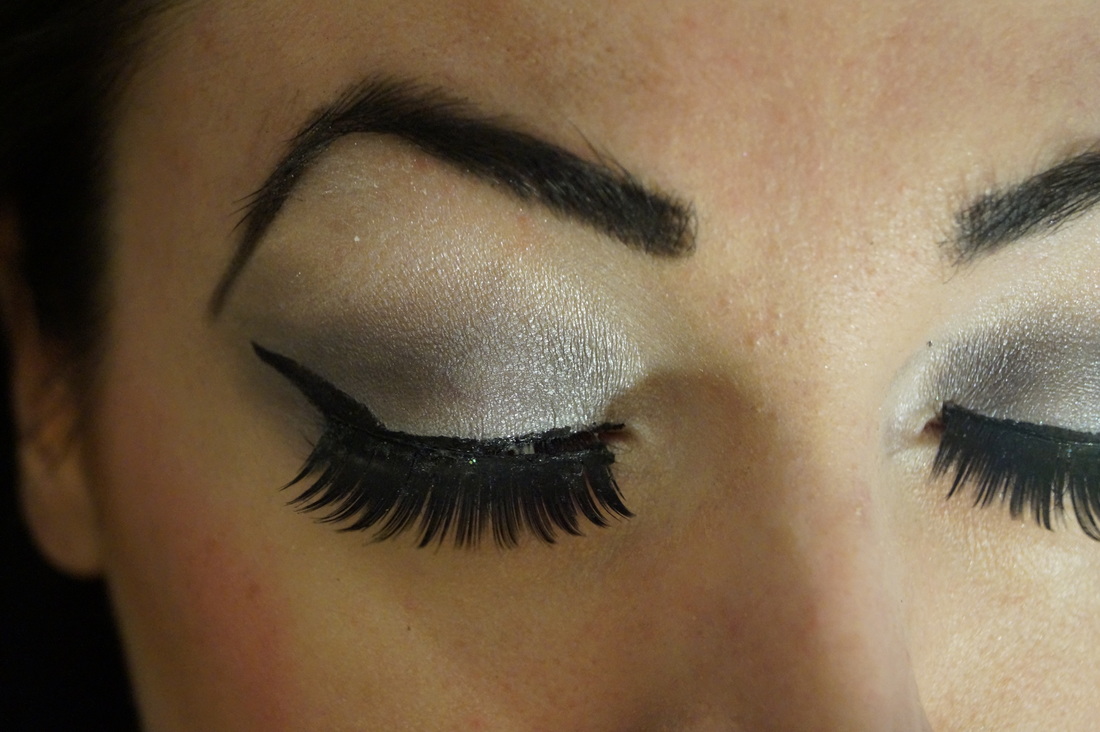
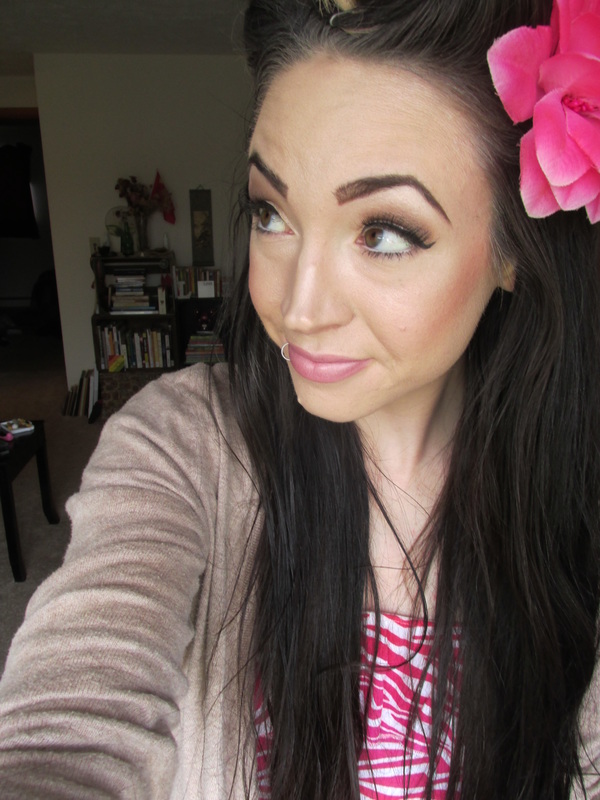
Step 6. Fill in your eyebrows. The thicker, darker, and more pointed, the better!

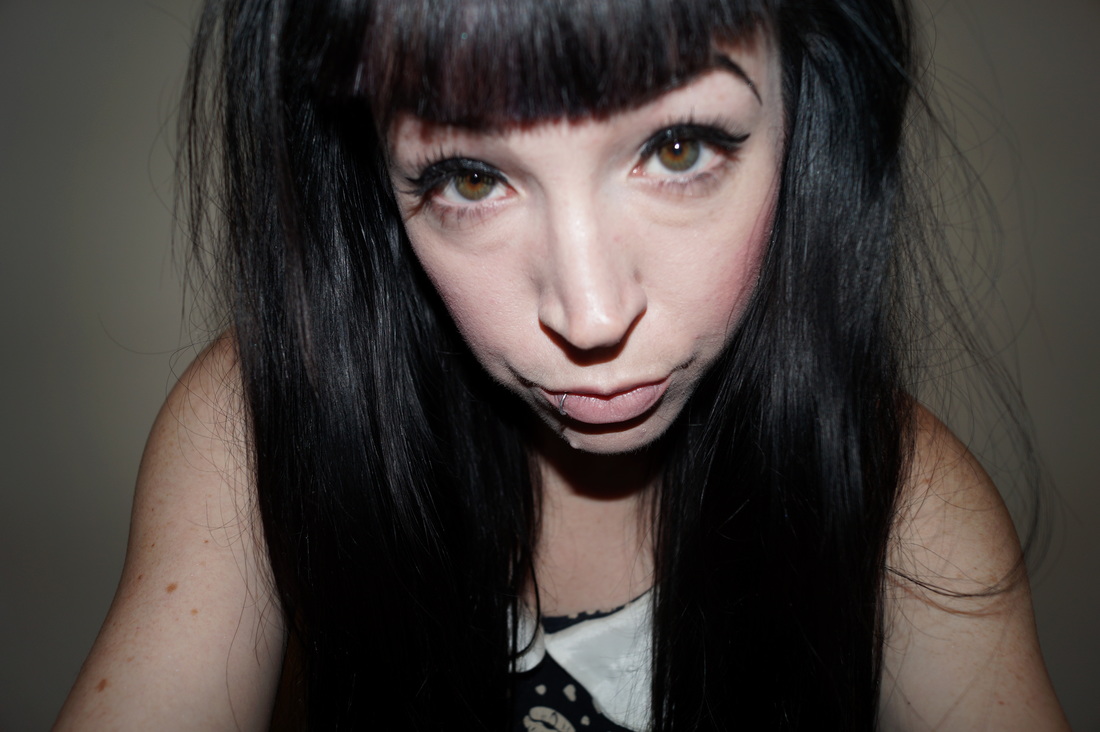
Step 7. Apply your fake eyelashes. They can be tricky at first, but once you get the hang of it, they're a breeze. I actually prefer wearing falsies to mascara!
A Very Vintage Valentine's Day Makeup Tutorial
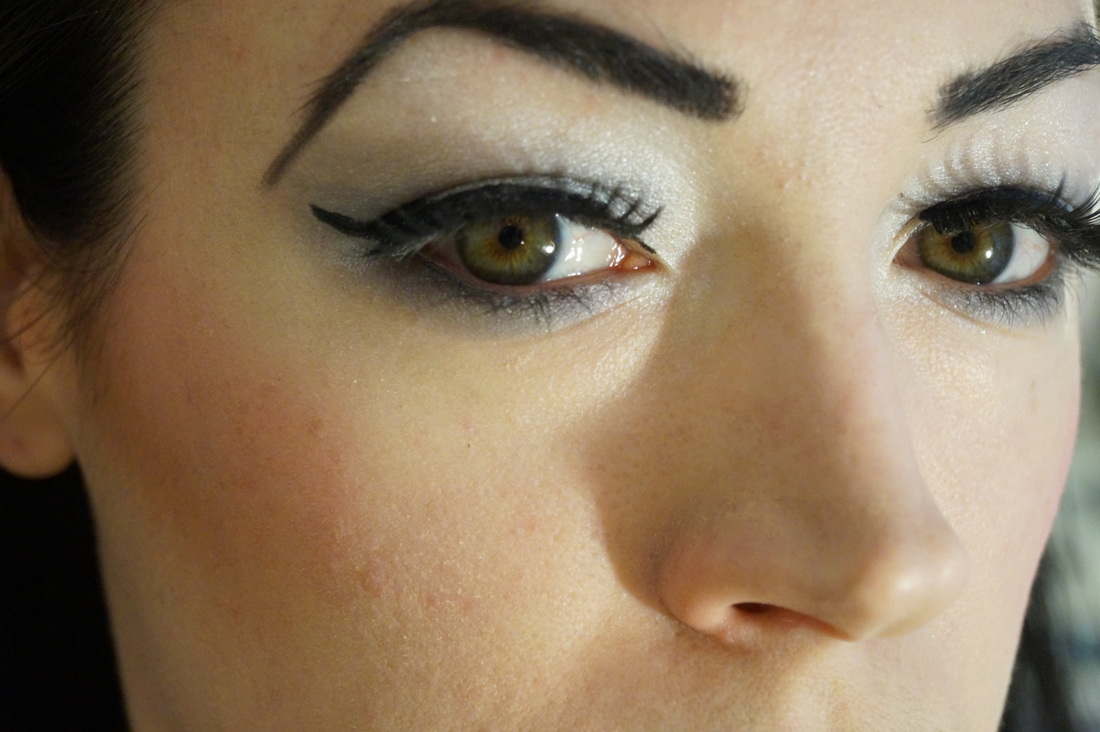
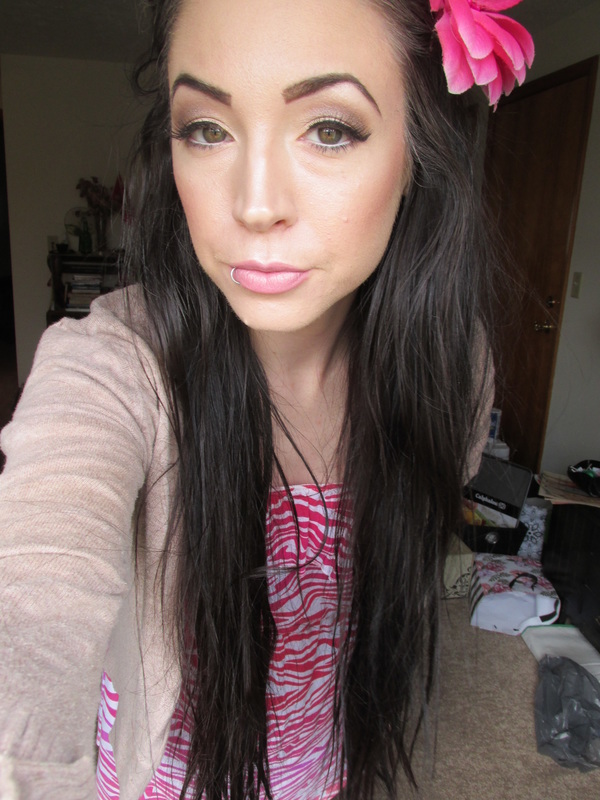
Step 8. Using a brown contouring powder (or a brown eyeshadow), and a thin contouring brush, sweep into the hollows of your cheekbone.
Step 9. With a fluffy blush brush (say that 3 times fast!), sweep a bright pink blush directly above, and slightly overlapping your brown shade. Blend blend blend!
A Very Vintage Valentine's Day Makeup Tutorial
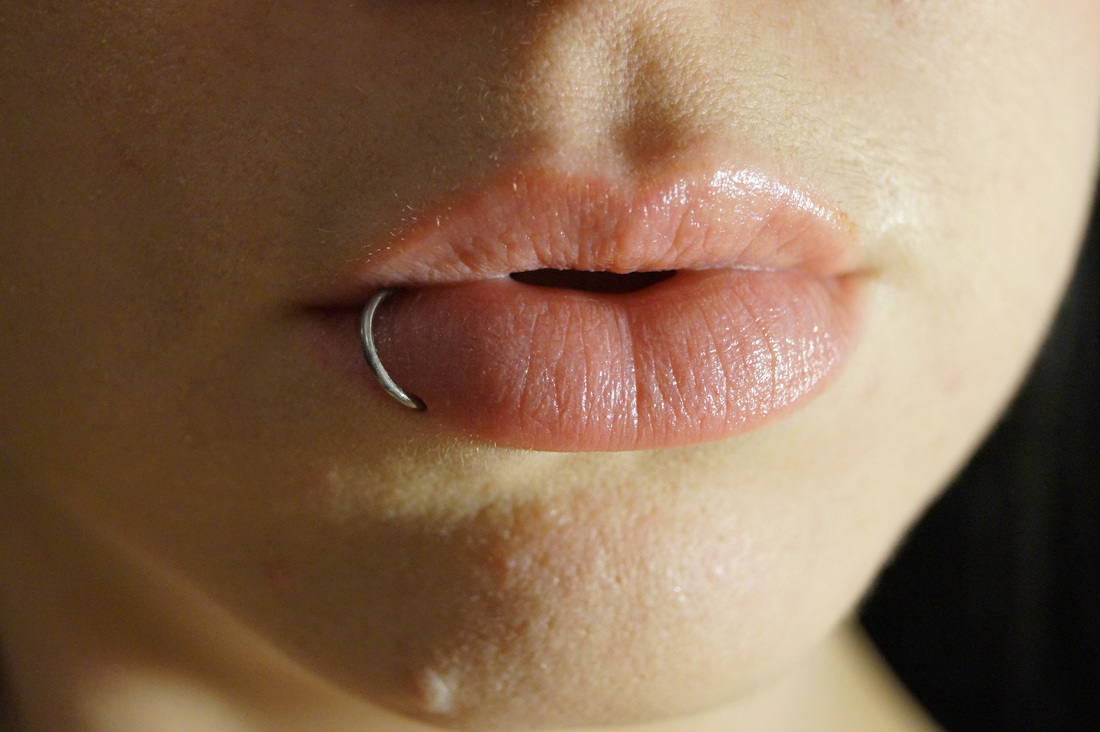
​Step 10. A pink nude lipstick tops off this look. Doutzen's nude by Loreal is the most perfect pink nude I have ever found!
A Very Vintage Valentine's Day Makeup Tutorial
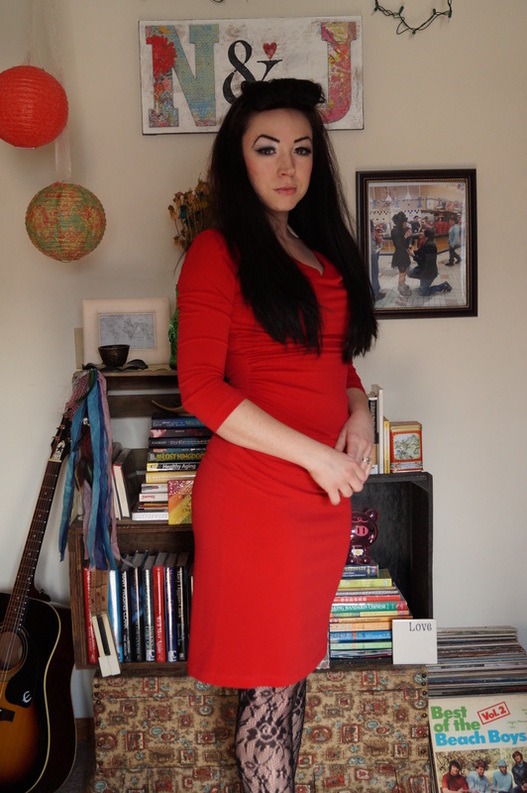
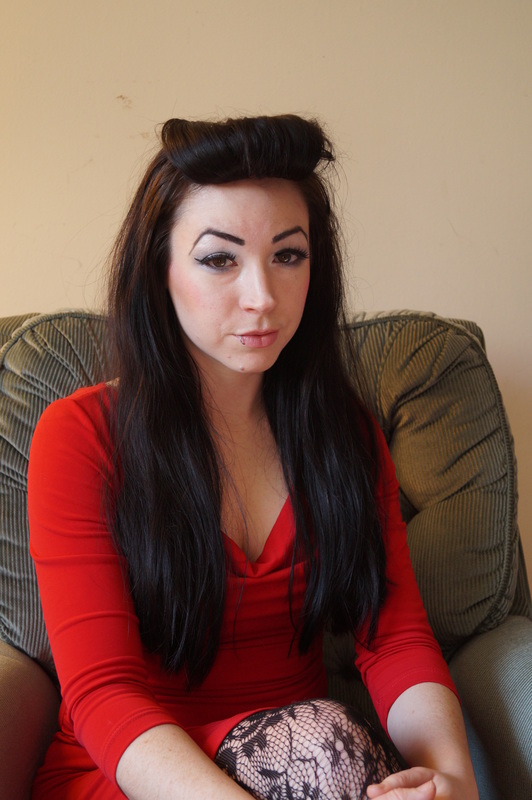
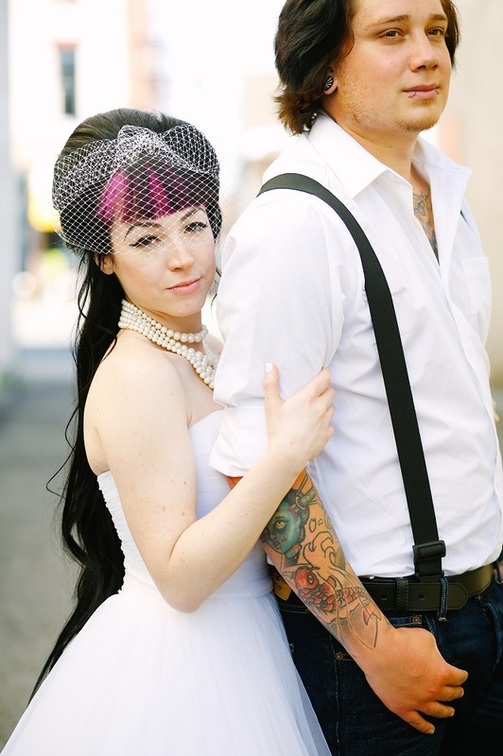
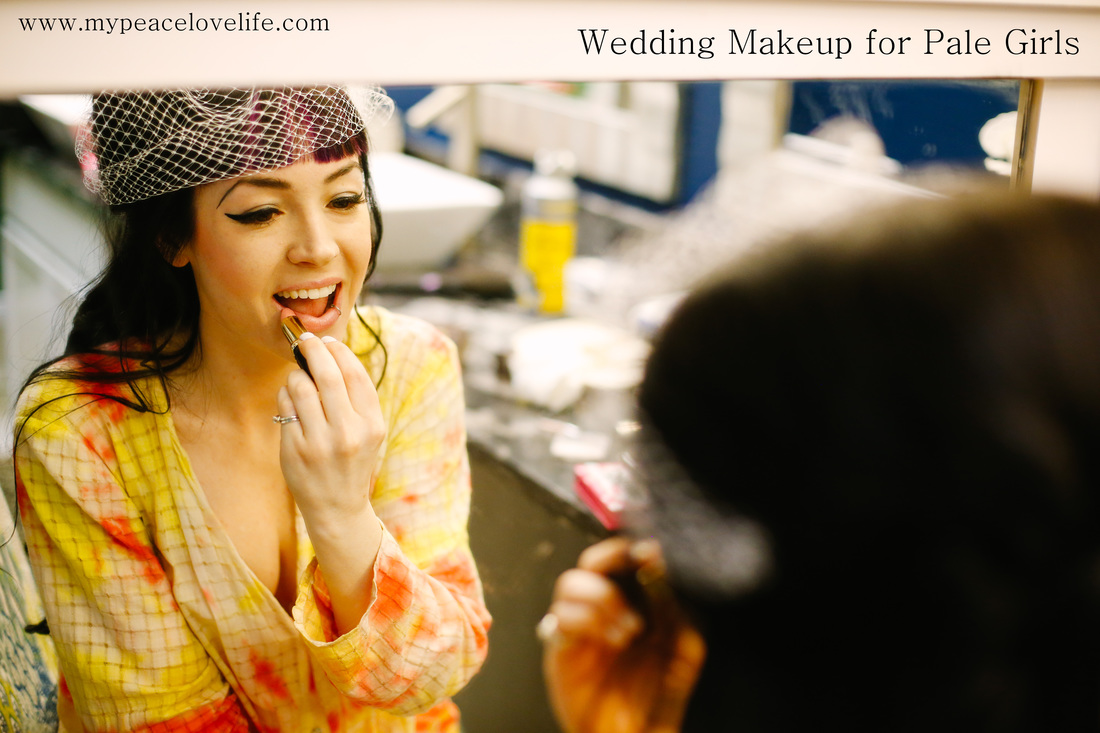
​Pair with some bumper bangs, or other pinup hairstyle, a slinky red (it is Valentine's Day after all!) dress, fishnets, and heels. Wow! You vintage Valentine's Day babe you!
​

A Very Vintage Valentine's Day Makeup Tutorial
Picture
Picture
Happy Valentine's Day! Have a wonderful time with the person you love!


​Peace Love and Valentine's Day Makeup
Jess <3

2 Comments

Wedding Makeup for Pale Girls

1/1/2016

6 Comments

 
Wedding Makeup for Pale Girls
I am a pale girl (And I embrace it). 
So for my wedding day, I knew there was no other way to go, than to work that paleness! But not everyone agreed with me, people were absolutely horrified that I wasn't going tanning before my big day! "What? You're actually going to look like yourself, and accept how you look?!!" I could almost hear people shouting at me!
If you're a pasty lady, you probably know exactly what I'm talking about! So just ignore all those orange, wrinkled, and leathery people who keep telling you that you need to be tan on your wedding day! 
I was the palest I've ever been (I carried an umbrella with me everywhere I went for months before the wedding), wore a bright white dress, and I looked fabulous! Here is how you can too!

Wedding Makeup for Pale Girls
This was me on my wedding day. Not too bad for someone that people like to make fun of because I'm pale!

When I was planning my wedding, I went to a professional makeup artist and had her do a trial run on me. When I got there, not only did she not have any foundation that was pale enough for me, but she didn't do my makeup anything like I wanted it!
This is what I left there looking like...
Wedding Makeup for Pale Girls
I looked nothing like myself, and not at all what I wanted to look like for my big day!
So after that experience, I decided to do my own makeup, and it was one of the best decisions I made for my wedding! I ended up looking like a better version of myself, and that's exactly how it should be!
So all you Casper the Ghost Complexioned women, I have two videos showing you exactly how I did my makeup for my wedding!
So that was video one, and now
...here's video 2!
Wedding Makeup for Pale Girls
The products I used for My Wedding Day:

-Primer
Pixi Redness Reducing Primer.

-Foundation
Urban Decay Naked Foundation, shade .05.

-Concealer
Pixi Undercover Crayon

-Powder
Physicians Formula 
​
-Blush
How to Make Your Face Wow

-Eyeliner
Wet n Wild H20 Proof Liquid Eyeliner.
I used the brush from Wet n Wild Mega Liner liquid eyeliner.

-Mascara
I don't even remember what kind I used. It didn't really matter what kind, because I had fake eyelashes, so I didn't need mascara that lengthened my lashes. All that mattered is that it was waterproof!
​
-Lip Primer
M.A.C Prep + Prime.

-Lipstick

Doutzens Nude 600 Loreal Colour Riche.

Wedding Makeup for the Pale Bride
Wedding Makeup for Pale Girls
So whether you have an upcoming wedding, you are planning to one day, or just want really pretty makeup for daily use, try this out, and see what you think!
​
(All my wedding photos were taken by Graham River Productions.)
​
Picture

Peace Love and Wedding Makeup
Jess <3

More Articles You Might Like:
Our Wedding!
Our Wedding!
Our 50's Diner Wedding Shoot!
Our 50's Wedding Diner Wedding Shoot!
Our Wedding Ceremony!

Sharing is Caring <3
​

6 Comments

Mermaid Braids Video Tutorial!

9/18/2015

1 Comment

 
Mermaid Braids Video Tutorial
These "Mermaid Braids" are super adorable, and surprisingly simple! I learned how to do a mermaid braid from a hair book I have. After seeing how cute it looked, I decided that I wanted to do two instead of one, and I absolutely loved the look! 
So here is how to do your very own Mermaid Braids!
(And don't mind my face in all these pictures! I was super distracted and in a hurry! Haha)

Try it! This looks cute with long hair, medium hair, and short hair too!

Mermaid Braid Hair Tutorial
I decorated my mermaid braids with some lace!
Find something cute to decorate yours with!

Mermaid Braids Hair Tutorial
Have a wonderful day lovelies! Don't forget to like this and share it around! 
Much love!

Picture
Is your home Halloween ready? Buy your very own Zombie Sheet Set here!

Peace Love and Mermaid Braids
Jess <3

More Articles You Might Like:
Picture
Poof with a Headband Tutorial
Picture
My Very First Hair Tutorial
Picture
Rosie the Riveter Hair Tutorial


1 Comment
<<Previous
Forward>>
      
    ​
    Picture

    I'm Jessica!

    I've traveled all over the world, but Ohio is where I call home. I'm a lifestyle & travel blogger, and author. I love setting goals, reading, and snuggling up with my fur babies. I can usually be found at my local thrift store, or in the hammock in my backyard.

    About Me
      
    Picture
      
    Picture


    Popular Posts

    Picture
      
    Picture
      
    Picture
      
    Picture
      
    Picture
      
    Picture
      
    Picture
      
    Picture

    Categories

    All
    Asia
    Atlanta
    Beauty
    Blogging
    Bucket List
    Caribbean
    Changing The World
    China
    Christmas
    Coffee Break Retro Style
    Diy
    Fashion
    Food
    Goals
    Guest Bloggers
    Halloween
    Health
    Home Decor
    Inspiration
    Money
    Music
    My Favorite Posts
    My Life
    North America
    Oceania
    Ohio
    Parties
    Sponsored Posts
    Support Small Businesses
    Volke House
    Wedding
    World Traveler
    Zero Waste

    Archives

    March 2023
    December 2022
    August 2022
    July 2022
    June 2022
    May 2022
    January 2021
    December 2020
    September 2020
    August 2020
    July 2020
    June 2020
    May 2020
    April 2020
    March 2020
    February 2020
    January 2020
    December 2019
    November 2019
    October 2019
    September 2019
    August 2019
    July 2019
    June 2019
    May 2019
    April 2019
    March 2019
    February 2019
    January 2019
    November 2018
    October 2018
    September 2018
    July 2018
    June 2018
    May 2018
    March 2018
    February 2018
    January 2018
    December 2017
    October 2017
    September 2017
    August 2017
    June 2017
    May 2017
    April 2017
    March 2017
    February 2017
    January 2017
    December 2016
    November 2016
    October 2016
    September 2016
    August 2016
    July 2016
    June 2016
    May 2016
    April 2016
    March 2016
    February 2016
    January 2016
    December 2015
    November 2015
    October 2015
    September 2015
    August 2015
    July 2015
    June 2015
    May 2015
    April 2015
    March 2015
    February 2015
    January 2015
    December 2014
    November 2014
    October 2014
    September 2014
    August 2014
    July 2014
    June 2014
    May 2014
    April 2014
    March 2014
    February 2014
    January 2014
    December 2013
    November 2013
    October 2013
    September 2013
    August 2013
    July 2013
    June 2013
    May 2013
    April 2013
    March 2013
    February 2013
    January 2013
    December 2012
    November 2012
    October 2012
    September 2012
    August 2012
    July 2012
    June 2012
    May 2012

    *Disclosure; This blog is a personal blog written by me. This blog accepts forms of paid advertising and sponsorship. The compensation received may influence the advertising content, topics or posts made in this blog. That content, advertising space or post will be clearly identified as paid or sponsored content. Even though I receive compensation for some posts or advertisements, I will always give my honest opinions, findings, or experiences on those topics or products. The views and opinions expressed on this blog are purely my own.*
    Picture
Powered by Create your own unique website with customizable templates.